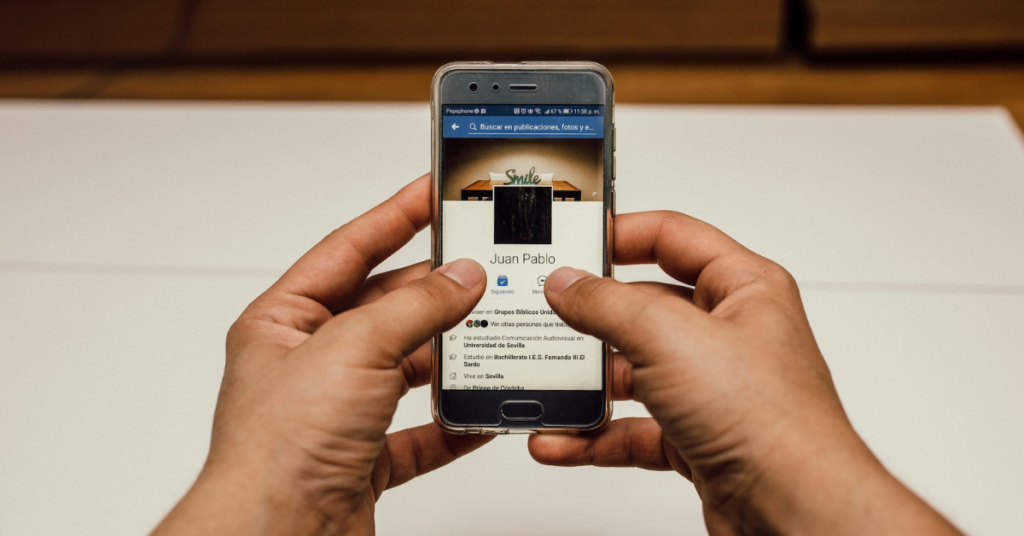
While using Facebook, many users have reported that the app does not show all photos in an album when scrolling through their albums.
If Facebook does not show all the photos in the album, this might be due to the accumulated cache, outdated Facebook app, and restricted photo privacy settings. To fix that, remove the App cache, update the app, and un-restrict the photo’s privacy within the album. If it fails, force close the app, restart your device, and check if it works.
In this article, we’ll explain why Facebook is not showing all photos in the album and discuss a few fixes to troubleshoot the problem immediately.
Why is Facebook not showing all the photos in the album?
If Facebook is not showing all photos in the album, it could be due to one or more of the following reasons:
- Accumulated Facebook app cache and data.
- Your Facebook application is outdated.
- Privacy Settings Restricting Visibility.
- Using an outdated version of the Web Browser.
- Facebook server outages.
- The browser software malfunctions.
- Your photo format is not supported.
- You have a slow or unstable Internet Connection.
- Photos were removed for violating Facebook rules.
How can I make Facebook show all the photos in the album?

To fix the “Facebook is not showing all photos in an album” try these 8 simple and easy solutions.
1. Clear Facebook App/Browser Cache
Accumulated cache and data on the device and the website can sometimes cause issues with photo loading. Clearing the Facebook cache can help resolve issues like slow loading times or problems with displaying photos. Here’s how to clear the Facebook app cache:
Android:
- Go to your phone’s “Settings”.
- Tap “Apps”.
- Scroll down and tap “Facebook”.
- Tap “Storage”.
- Tap “Clear Cache”.
iPhone:
Clearing the cache on an iPhone requires uninstalling and reinstalling the Facebook app. This should be considered a last resort if other solutions haven’t worked.
Browser:
- Open the “Chrome Browser”
- Click the “three-dot menu icon” preset at the top right corner.
- Hover over the “More tools”
- Click “Clearing browsing data.”
- From the time range, select “All time.”
- Click on “Clear data.”

2. Update the Facebook App:
Updating the Facebook app is important to ensure that you have access to the latest features, and it helps resolve bugs. Here’s how to update the Facebook app on your devices:
Android:
- Open the “Play Store” app.
- Tap the three horizontal lines in the top left corner of the screen.
- Tap “My apps & games.”
- Tap “Updates.”
- If Facebook is listed, tap “Update.”
- If Facebook is not listed, the app is up to date.
iPhone:
- Open the “App Store”.
- Tap “Updates”.
- Tap “Update” next to Facebook.
- Enter your “Apple ID password” if prompted.
- The Update will download and install.
- Open “Facebook”.
Desktop:
- Open “Microsoft Store”.
- Click on the three dots in the top right corner.
- Select “Downloads and updates”.
- Click “Get updates”.
- Facebook and other apps will start updating.
Note: You may need to restart your computer for the updates to take effect.
3. Update Your Web Browser
Using an outdated web browser may cause compatibility issues with Facebook, leading to missing photos. Let’s update your browser for seamless photo viewing:
- Open your “browser.”
- Click on the three dots in the top right corner of the screen.
- Select “Help” from the menu.
- Click on “About”.
- Your browser will check for updates and install them if available.
- Restart your browser.

After updating your web browser, revisit your Facebook album to see if the missing photos are visible.
Note: The steps may vary depending on your web browser. For example, in Google Chrome, you can click on the three dots in the top right corner of the screen, select “Help,” and then click “About Google Chrome” to check for updates.
4. Adjust the Photo Privacy Settings:
Facebook allows you to control who can see your photos. If you have restricted the privacy of specific photos, they may not be visible to everyone in the album. To ensure your photos are visible to the desired audience, follow these step-by-step instructions.
Android and iPhone:
- Open “Facebook app”.
- Tap “Profile picture.”
- Tap “Photos”.
- Open album.
- Tap three dots in the top-right corner.
- Tap “Edit” album privacy.
- Select privacy level.
- Tap “Save” or “Done.”
Browser:
- Open Facebook in your preferred browser.
- Log in to Facebook.
- Click your Profile picture.
- Click “Photos”.
- Open the album.
- Click the three dots.
- Choose “Edit album.”
- Select privacy level.
- Click “Save”.

5. Restart Your Facebook App:
Restarting the app can often be a quick and effective solution if you encounter minor issues or glitches while using the Facebook app on your device. Restarting the app helps to clear temporary data and refresh its functionality.
Follow these simple steps to restart the Facebook app on both Android and iPhone platforms:
Android:
- Long-press the Facebook icon
- Tap “Close” or “Force Stop,”
- Relaunch.
Iphone:
- Double-click the home button (or swipe up and hold)
- Swipe “Facebook” off the screen
- Reopen.
6. Refresh Your App or Browser
Facebook’s servers occasionally experience glitches, resulting in missing photos. Let’s troubleshoot this issue with the following steps:
Android
- Close “Facebook” from recent apps.
- Reopen “Facebook”.
- Check photo albums for reappeared photos.
iPhone:
- Close “Facebook” from recent apps.
- Reopen “Facebook”.
- Go to photo albums.
- Review for albums reappeared.
Desktop:
- Click the “Refresh button” or press the “F5 key” to refresh the page.
- Check photo albums for reappeared photos.
7. Optimize Your Browser Settings:
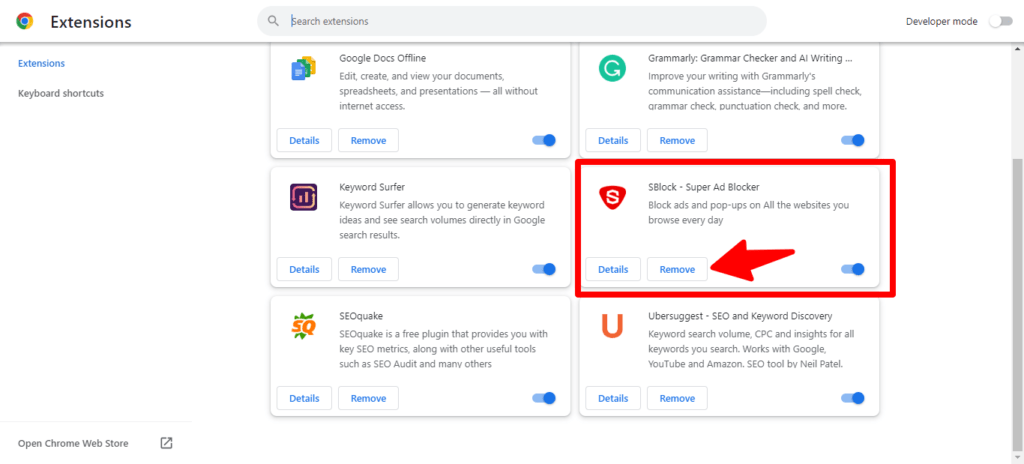
Once you open multiple tabs in the browser, installing extensions like ad blockers and email extractors might cause the browser to slow down. It is important to close the extra tabs and remove the extensions from the browser to function correctly with the Facebook web application. Now close all the tabs and try to load Facebook again if it works correctly.
To remove the browser extension, follow these steps.
- Open the “Chrome browser” where you want the Facebook
- Click on the “three-dot menu icon” at the top right corner of the screen
- Click on “Settings” from the drop-down menu, and settings will open
- Click on “Extensions” from the left sidebar within the settings tab
- From the extensions window, find these extensions
- Click on “remove.”
- Now confirm it

Note: Once you remove the extensions, clear the cookies and data from the browser and reopen the Facebook.
8. Review and comply with Facebook’s Rules.
Sometimes, certain photos may not appear in your album because they violate Facebook’s community standards or content guidelines. To ensure your photos meet the platform’s rules, follow these steps:
- Open the Facebook app on your Android or iPhone device or visit www.facebook.com in your preferred web browser.
- Tap on your profile picture or name to access your profile.
- Tap “Photos” to view your albums.
- Please review the photos and ensure they meet Facebook’s community standards.
- Remove or edit any photos that may violate the guidelines.
Related Articles:
Instagram Not Sending Password Reset Email And SMS
Conclusion:
In this blog post, we have discussed the reasons behind the missing photos within the Facebook album. Additionally, we have briefly explained the steps to resolve the “Facebook not showing all photos in album.” If this worked for you, please let us know in the comments, or if the problem persists, try to contact the Facebook support team to get rid of this issue.
